Repairing your GE washing machine can often be achieved with readily available resources, like detailed service manuals and online guides, offering step-by-step assistance.
GE Appliances provides extensive owners’ manuals and technical service manuals accessible through their website, aiding in troubleshooting and component replacement.
Understanding your machine’s specific model and accessing the correct documentation are crucial first steps for successful GE washer repair and maintenance procedures.
These resources empower homeowners to tackle common issues, potentially avoiding costly professional service calls and extending the lifespan of their appliance.
Understanding Your GE Washer Model
Identifying your specific GE washing machine model is paramount before attempting any repair work; model numbers are typically found on a label located inside the lid, on the frame, or at the rear of the appliance.
This number unlocks access to the correct service manual and parts diagrams, ensuring you’re working with accurate information tailored to your machine’s configuration.
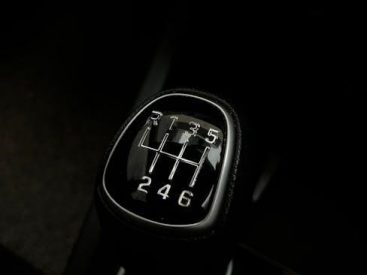
GE washers come in various types – top-load agitator, top-load impeller, and front-load – each with unique components and repair procedures; knowing your type dictates the approach.
The service manual for your model will detail specific disassembly instructions, wiring schematics, and component locations, crucial for safe and effective repairs.
Different models may utilize varying control boards, pumps, or agitator designs, so a generic repair guide won’t suffice; precision is key to avoiding further damage.
Always cross-reference the model number with the manual to confirm compatibility before ordering parts or following repair steps, preventing incorrect installations.
Proper model identification streamlines the repair process, saving time and frustration, and maximizing the chances of a successful outcome.
Safety Precautions Before Repair
Prioritize safety by disconnecting the washing machine from the power outlet before commencing any repair; electricity and water are a dangerous combination, demanding caution.
Turn off both the hot and cold water supply valves to prevent accidental flooding during component removal or replacement; have towels readily available for minor spills.
Refer to the service manual for specific safety warnings related to your GE washer model; some components may retain residual energy even when unplugged.
Wear appropriate personal protective equipment (PPE), including gloves and eye protection, to shield against sharp edges, chemicals, and potential hazards.
Never attempt repairs if you are uncomfortable working with electrical components or lack the necessary skills; seek professional assistance when in doubt.
Avoid disassembling or modifying any cleaner components without explicit authorization, as outlined in the manual, to prevent malfunctions or safety risks.
Ensure a well-lit and ventilated workspace to facilitate clear visibility and prevent the buildup of fumes from cleaning agents or solvents.

Common GE Washing Machine Problems
GE washer issues frequently include failures to start, drain, or stop leaking, alongside unusually loud noises during operation; manuals aid diagnosis.
Washer Won’t Start
If your GE washer fails to start, consult the service manual for troubleshooting steps, beginning with verifying power supply and the door switch functionality.
A common culprit is a faulty lid switch, preventing operation for safety; the manual details its location and testing procedures using a multimeter.
Check the control panel for error codes, referencing the manual for their specific meanings and suggested resolutions, potentially indicating a control board issue.
Inspect the motor overload protector, a safety device that shuts off the motor if it overheats; the manual illustrates how to access and test this component.
Furthermore, a defective timer or control board can also prevent the washer from initiating a cycle; the manual provides diagrams for component identification and replacement.
Always disconnect power before any inspection or repair, and refer to the GE appliance manual for detailed safety precautions and specific model instructions.
Remember to carefully follow the manual’s guidance to avoid electrical shock or further damage to the appliance.
Washer Won’t Drain
When a GE washer won’t drain, the service manual is your primary resource for diagnosing the issue, starting with the drain pump itself.
The manual provides instructions for accessing and inspecting the drain pump for obstructions like lint, small objects, or a damaged impeller.
A clogged drain hose is another frequent cause; the manual illustrates how to disconnect and clear the hose, ensuring a free flow of water.
Check the drain pump filter, if equipped, as outlined in the manual, for accumulated debris preventing proper drainage.
Furthermore, a faulty drain pump motor or a blocked pump housing can hinder operation; the manual details testing procedures and component replacement.
The control board may also be the source of the problem, failing to signal the drain pump; the manual offers guidance on control board diagnostics.
Always disconnect power before any repair, and consult the GE appliance manual for safety guidelines and model-specific instructions.
Washer is Leaking Water
If your GE washer is leaking water, the service manual is essential for pinpointing the source and implementing a solution effectively.
The manual guides you through inspecting the water inlet hoses and connections for looseness or cracks, recommending tightening or replacement as needed.
Check the drain hose connections, ensuring they are secure and free from damage, referencing the manual’s diagrams for proper installation.
A leaking tub seal or a damaged tub itself can cause leaks; the manual details how to access and assess these components for repair or replacement.
Inspect the water pump and its housing for cracks or leaks, utilizing the manual’s illustrations to locate and diagnose potential issues.
The detergent dispenser can also be a source of leaks; the manual provides instructions for cleaning and inspecting the dispenser assembly.
Always disconnect power before starting any repair, and consult the GE appliance manual for safety precautions and model-specific guidance.
Washer is Making Loud Noises
Loud noises from your GE washer often indicate mechanical issues, and the service manual is invaluable for diagnosis and repair.
The manual guides you through inspecting the drive belt for wear or damage, detailing the procedure for replacement if necessary, including tension adjustments.
Check the motor coupling for cracks or breakage, referencing the manual’s exploded views to understand component placement and proper installation.
Worn or damaged drum bearings can cause significant noise; the manual provides instructions for accessing and replacing these bearings.
Inspect the suspension rods and springs for proper function, as these components support the tub and dampen vibrations, as shown in the manual.
Foreign objects lodged between the inner and outer tubs can also create noise; the manual outlines disassembly procedures for removal.
Always disconnect power before any repair, and consult the GE appliance manual for safety guidelines and model-specific troubleshooting steps.

Essential Tools for GE Washer Repair
GE washer repair demands basic hand tools, a multimeter for electrical testing, and specialized tools detailed in the service manual for efficient disassembly.
Accessing components often requires specific sockets, wrenches, and pliers, all referenced within the comprehensive GE appliance repair documentation.
Basic Hand Tools
Successfully tackling GE washing machine repairs begins with a solid foundation of basic hand tools, frequently referenced within the service manual for various tasks.
A comprehensive screwdriver set – including Phillips head and flathead – is paramount, enabling access to panels and component securing screws.
Pliers, encompassing slip-joint and needle-nose varieties, prove invaluable for gripping, bending, and manipulating wires and hoses during disassembly.
Adjustable wrenches, ranging in size, are essential for loosening and tightening nuts and bolts encountered throughout the machine’s structure.
Sockets and ratchet sets, with extensions, provide leverage for stubborn fasteners, particularly when dealing with the motor or pump assembly.
Don’t overlook the utility of a rubber mallet for gently persuading stuck components loose, avoiding damage as outlined in the GE repair guides.
Having these fundamental tools readily available streamlines the repair process, allowing you to confidently follow the manual’s instructions.
Multimeter and Electrical Testing Tools
Diagnosing electrical faults within a GE washing machine necessitates specialized testing tools, often detailed in the service manual for accurate readings.
A digital multimeter is indispensable, allowing you to measure voltage, resistance, and continuity – crucial for identifying faulty wiring or components.
Voltage testers, including non-contact varieties, provide a quick assessment of live circuits, ensuring safety before commencing any electrical work.
Circuit tracers aid in locating broken or damaged wires hidden within the machine’s wiring harness, as described in the GE repair documentation.
Amp clamps measure current flow, helping to pinpoint overloaded circuits or malfunctioning motors, referencing the manual’s specifications.
Electrical tape and wire connectors are vital for safely repairing damaged wiring, adhering to the standards outlined in the service manual.
Proper use of these tools, guided by the GE washer’s manual, ensures accurate diagnosis and safe repair of electrical issues.
Specialized Washer Repair Tools
Beyond basic tools, GE washing machine repair often demands specialized equipment, frequently illustrated within the service manual for clarity.
A socket set, including deep-well sockets, is essential for accessing and removing components like the drain pump and motor, as the manual details.
Pliers – including needle-nose and locking pliers – assist in gripping and manipulating hoses, clamps, and wiring connectors during disassembly.
A strap wrench is invaluable for loosening and tightening large, smooth components like the tub or drum, guided by the GE repair instructions.
A pulley removal tool simplifies the process of removing pulleys from the motor and transmission, preventing damage as shown in the manual.
Hose clamp pliers efficiently remove and install spring clamps on hoses, streamlining fluid line repairs, referencing the GE diagrams.
Having these specialized tools, alongside the service manual, significantly improves the efficiency and accuracy of your GE washer repair.

Step-by-Step Repair Guides
GE service manuals provide detailed, illustrated guides for component replacement, like the water inlet valve or drain pump, ensuring accurate repairs.
These guides outline procedures, from agitator repair to belt replacement, offering clear instructions for both novice and experienced technicians.
Replacing the Water Inlet Valve
Replacing the water inlet valve is a common GE washer repair, often necessary when the machine isn’t filling correctly. First, disconnect power and water supply lines. Next, locate the valve—typically at the back of the washer—and detach the hoses and electrical connectors.
Refer to your GE washer’s service manual for specific diagrams and instructions, as valve placement varies by model. Remove the old valve, noting the orientation of any seals or brackets. Install the new valve, ensuring a secure connection of hoses and electrical connectors.
Double-check all connections for tightness to prevent leaks. Finally, restore water and power, then test the washer to confirm proper filling. Service manuals often detail testing procedures to verify the new valve’s functionality, ensuring a successful repair and preventing future issues. Always prioritize safety during this process.
Replacing the Drain Pump
Replacing a faulty drain pump restores a GE washer’s ability to effectively remove water. Begin by disconnecting power and carefully draining any remaining water from the machine. Locate the drain pump—usually accessible from the front or rear panel—and detach the hoses and electrical connector.
Consult your GE washer’s service manual for precise pump location and disassembly instructions, as designs differ. Remove the old pump, inspecting the housing for debris or damage. Install the new pump, ensuring secure hose and electrical connections.
Verify proper alignment and tightness to prevent leaks. Restore power and run a drain cycle to test the repair. Service manuals provide testing procedures to confirm pump operation. A successful replacement resolves draining issues and prevents water damage.
Replacing the Drive Belt
Replacing a worn or broken drive belt is a common GE washer repair, restoring the machine’s ability to agitate and spin. First, disconnect power and access the belt, typically by removing the back panel. Consult your GE washer’s service manual for specific access points and component locations.
Note the belt’s routing around the motor pulley and transmission before removal. Release tension on the motor to remove the old belt. Install the new belt, ensuring it’s correctly seated in the pulleys and has proper tension. Refer to the manual for tensioning specifications.
Reassemble the washer and test its operation. Service manuals often detail belt tension adjustment procedures. A correctly installed belt ensures smooth and efficient washing cycles, preventing slippage and operational failures.
Repairing the Agitator/Impeller
Addressing agitator or impeller issues restores proper washing action. GE washer service manuals detail agitator/impeller removal, often involving removing the top panel and central cap. Inspect for damage – cracks, breaks, or worn components like the agitator coupling.
To repair, replace damaged parts. The manual guides through agitator coupling replacement, a frequent fix. Tighten the hub nut securely, as outlined in the service manual, ensuring proper agitator/impeller function. Incorrect tightening can cause noise or failure.

Reassemble carefully, following the manual’s diagrams. Test the washer to confirm the agitator/impeller operates smoothly and effectively. Proper repair restores the machine’s cleaning performance and prevents further damage.

Accessing GE Washing Machine Service Manuals
Locate detailed GE washer service manuals online through GE Appliances’ owner support website or dedicated appliance literature sites for effective repairs.
Finding Online Service Manuals
Numerous online resources offer GE washing machine service manuals in PDF format, providing detailed schematics and repair procedures for various models. A simple web search using your specific model number, coupled with terms like “service manual” or “technical manual,” often yields fruitful results.
Appliance literature websites frequently archive these documents, offering a centralized location for finding manuals that may no longer be readily available on the manufacturer’s site. Remember to verify the manual corresponds precisely to your washer’s model number to ensure accuracy.
Caution should be exercised when downloading from unofficial sources; prioritize reputable websites to avoid malware or inaccurate information. The GE Appliances website itself is the most reliable source, but third-party archives can be helpful when the official manual is unavailable. Always cross-reference information when possible.
GE Appliances Owner Support Website
The GE Appliances Owner Support website is a primary resource for accessing manuals and troubleshooting information for your washing machine. Navigate to the “Owners Support” section, typically found at the top of the GE Appliances web page, to begin your search.
Within this section, you can select “Appliance Manuals” to browse a comprehensive library of PDF documents. Enter your model number into the search bar to quickly locate the specific manual for your GE washer. Both owner’s manuals and technical service manuals are often available.
The website also provides FAQs, how-to videos, and parts diagrams, offering additional support for DIY repairs. Registration of your appliance can unlock personalized support and warranty information. Utilizing this official resource ensures you have accurate and up-to-date documentation.
Understanding Technical Service Manuals
Technical service manuals, unlike owner’s manuals, are designed for qualified technicians, containing detailed schematics, wiring diagrams, and step-by-step disassembly instructions. These manuals provide in-depth information for diagnosing and repairing complex issues within your GE washing machine.
They often include troubleshooting flowcharts, component testing procedures, and error code explanations, assisting in pinpointing the root cause of malfunctions. Understanding these manuals requires a basic knowledge of electrical and mechanical systems.
Service manuals detail procedures like control panel removal, switch replacement, and motor/transmission repair, offering a comprehensive guide for advanced repairs. Accessing these manuals, often in PDF format, is crucial for tackling intricate problems beyond basic maintenance.

Component-Specific Repair Procedures
Detailed service manuals outline procedures for specific parts, like control panels, switches, motors, and transmissions, guiding technicians through complex repairs effectively.
Control Panel Removal and Repair
Accessing the control panel typically involves removing screws located at the rear or underside of the panel, and carefully lifting it to disconnect wiring harnesses. Service manuals provide diagrams illustrating connector locations and wire colors for proper disconnection.
Common issues include unresponsive buttons, display errors, or complete panel failure; these often stem from faulty switches or a malfunctioning control board. Repair may involve replacing individual switches, which can be tested with a multimeter for continuity.
If the control board is defective, it requires replacement, ensuring the new board is compatible with the washer model. Always disconnect power before working on the control panel to prevent electrical shock. Refer to the GE appliance service manual for specific torque specifications when reassembling.
Carefully inspect wiring for damage or corrosion, and replace any compromised wires. Proper reconnection of all harnesses is vital for functionality, following the manual’s wiring diagrams precisely.
Switch Replacement
Identifying a faulty switch often requires a multimeter to test for continuity when the switch is activated; a lack of continuity indicates failure. GE service manuals detail the location of various switches, including lid switches, water level switches, and start/pause switches.
Removal typically involves disconnecting the switch’s wiring harness and releasing retaining clips or screws. Carefully note the switch’s orientation before removal to ensure correct installation of the replacement. Always disconnect power before beginning any electrical work.
When installing the new switch, ensure it’s securely fastened and the wiring harness is firmly connected. Refer to the manual for specific torque specifications for mounting screws. Testing the new switch with a multimeter before reassembly confirms functionality.
Proper switch operation is crucial for washer safety and performance; a malfunctioning lid switch, for example, can prevent the machine from spinning. Consult the GE appliance manual for detailed diagrams and troubleshooting steps.
Motor and Transmission Repair
Motor and transmission repairs are complex and often require specialized tools and knowledge; GE service manuals provide detailed exploded views and repair procedures. Diagnosis typically involves checking the motor windings for shorts or opens using a multimeter, as outlined in the manual.
Transmission issues often manifest as loud noises or failure to agitate or spin. Repair may involve replacing worn bearings, seals, or gears, requiring complete disassembly of the transmission. Always consult the manual for specific instructions.
Motor replacement usually involves disconnecting the wiring harness, removing mounting bolts, and carefully lifting the motor out of the washer. Ensure the new motor is properly aligned and secured before reconnecting the wiring.
Due to the complexity, consider professional assistance for motor and transmission repairs if you lack experience. GE manuals emphasize safety precautions when working with electrical components and heavy machinery.
Preventative Maintenance for GE Washers
Regular cleaning, limescale removal, and hose inspections—detailed in the GE manual—prolong washer life and prevent costly repairs, ensuring optimal performance.
Regular Cleaning Procedures
Maintaining a clean GE washing machine is paramount for optimal performance and longevity, as outlined in your appliance’s manual. Regularly wipe down the exterior surfaces with a damp cloth and mild detergent to prevent grime buildup.
More importantly, the washing machine tub requires periodic cleaning to eliminate detergent residue, fabric softener, and potential mold or mildew growth. The GE manual recommends running an empty hot water cycle with a washing machine cleaner, or alternatively, with a cup of white vinegar.
This process effectively cleans the tub and removes lingering odors. Additionally, clean the detergent dispenser and fabric softener compartment regularly to prevent clogs and ensure proper dispensing. Following these simple procedures, detailed within the GE repair manual, will contribute significantly to the overall health and efficiency of your washing machine.
Limescale Removal
Limescale buildup, a common issue in areas with hard water, can significantly reduce the efficiency of your GE washing machine, as detailed in the repair manual. This mineral deposit accumulates within the machine’s internal components, hindering water flow and potentially causing damage.
The GE appliance manual suggests periodically running a cleaning cycle specifically designed for limescale removal. This typically involves adding a powdered limescale cleaning agent to the detergent dispenser and running a hot water cycle without any laundry.
Alternatively, a solution of white vinegar can be used, though always consult your manual for specific recommendations. Regular limescale removal, performed according to the GE service manual’s instructions, ensures optimal performance, prolongs the machine’s lifespan, and maintains water heating efficiency.
Checking Hoses and Connections
Regularly inspecting the hoses and connections of your GE washing machine is a vital preventative maintenance step, as emphasized in the GE repair manual. These components are susceptible to leaks, cracks, and loosening over time, potentially causing water damage.
The manual advises checking both the hot and cold water inlet hoses for signs of wear, bulges, or kinks. Ensure the connections at both the faucet and the washing machine are tight, but avoid over-tightening, which can damage the fittings.
Furthermore, inspect the drain hose for any obstructions or damage. A secure connection to the drainpipe is crucial to prevent backups. Following the GE appliance manual’s guidance on hose inspection and replacement contributes to a safe and efficient washing machine operation.